Taurus Car Club of America : Ford Taurus Forum banner

How Do I Install New Gauges?

1 reading
2K views 13 replies 10 participants last post by  mikeo007  
#1 ·
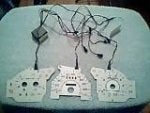
Can someone help me??? I have recently bought some new gauges to my 99 Taurus and i tried taking off the old factory gauges but I'm having a hard time. I believe i have taken off all necessary dashboard itemz/partz but not sure. I can touch the actual needle and everything but dont know how to take off. Can someone help me out?
 

Attachments

#7 ·
Funny....I had no idea you had to place new guages over the top of old. I'll be watching this thread very closely. I urge any of you who have done this mod to please post links or pics. Thanks OP for asking the Q.
 
#9 ·
Originally posted by DaChicagoBull@Jun 28 2006, 08:09 PM
Question regarding the gauges. Once the gauges have been put over old ones, where do you plug them in? How do you wire them? Where do you get power to them?
You need to take the positive wire (should be red) and splice it into the brown wire of your headlight switch. The ground wire (should be black) needs to be grounded somewhere in the car. When I had my glow gauges I grounded it to a screw underneath the dash (directly underneath the steeringwheel).

__________________
Best Car Insurance | Auto Protection Today | FREE Trade-In Quote
 
#10 ·
Originally posted by achang1@Jun 29 2006, 09:42 AM
by the pic of his "overlays" it looks like hes still gonna have to take off the needles. thers a write up on the wiki methinks
Nope. They pop right over the needles. PLEASE try everything NOT to remove the needles! It's a PIA to get them right again.

__________________
Best Car Insurance | Auto Protection Today | FREE Trade-In Quote
 
#11 ·
I've done this before on my Mustang and a friend's.

Use a digital camera and take a picture of the gauges before you start work. This way you have a point of reference to position the needles when it comes to reinstall.

For the middle and right gauge it appears that you will not need to pop off their needles, simple slide the needle through the holes and postion the overlay against the original gauge. Now if the base of the needle is too big to allow the overlay to fit you will need to remove the needle.

A good tool to use to remove the needle is your common fork. Slide two of the fork prongs below the base of the needle and slowly pull. It will come off. Position the overlay where required and install the needle. Position the needle with reference to the photo you took on your camera.

For splicing you will need a hayes shop manuel to locate the headlamp switch circuit. It will provide you with the proper information as to which wire does what. Splice into the wire that activates the parking lights sicne that activates the dashlamp lights as well.
 
#13 ·
I have these, but I have no idea how to hook them up. Can someone explain the wiring of them? The temp/gas and speedometer have 2 black wires each, and the RPM meter has 2 red wires...

I don't have the little box in that first pic, and I dont have a switch or button either. Just the gauge faces and the wires.